

Embellished bridal nails are a stunning and elegant way to complete the wedding day look. By adding delicate adornments like rhinestones, pearls, or crystals to nails, you can create a personalised and glamorous touch that complements the bridal attire. In this step-by-step guide, nail artist Sabur Ali, Founder, The Bong Nails, Jabalpur walks you through the process of creating intricate and elegant nail designs. This guide teaches you how to create stunning nail designs, from choosing the right base colour to adding delicate embellishments, transforming the bride’s hands into a work of art.
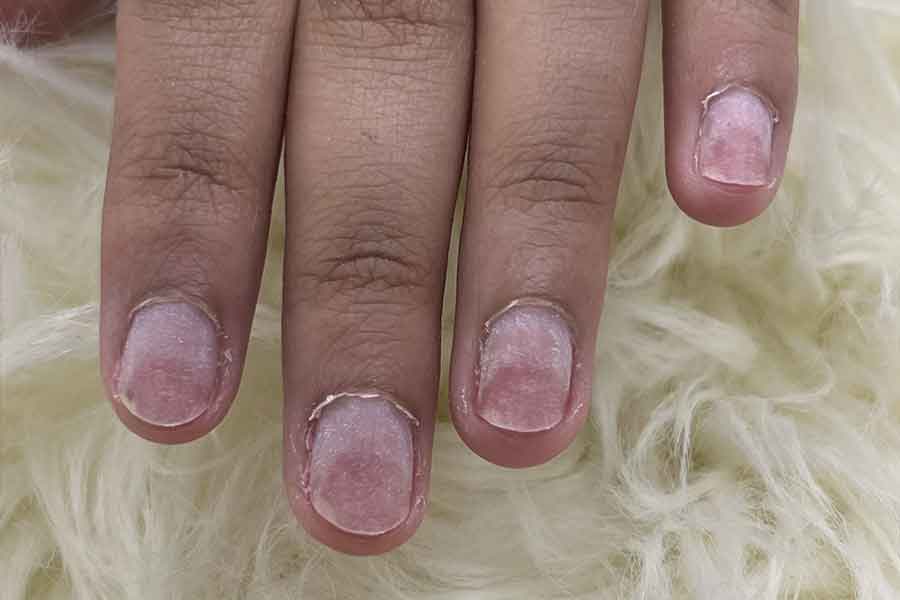
Step 1: Nail Preparation

Purpose: Cleans the nail surface and removes any old nail polish, natural oils and dead skin.
Method: Use a nail cleanser or alcohol-soaked cotton pad to wipe the nails clean.
Step 2: Nail Trimming and Buffing

Purpose: Trimming of the natural nail surface ensures that the extensions last longer without lifting while buffing helps the nail polish adhere better to the natural nails.
Method: Use a nail buffer and a pair of clippers to trim and buff the nails as desired.
Step 3: Cuticle Softener
Purpose: Softens and moisturises the nails, helping in enhancing the appearance of nails.
Method: Apply the solvent around the cuticle and let it penetrate for about 30 seconds.
Step 4: Cuticle Pusher

Purpose: Removes any dead or loose skin around the base of the nail.
Method: Gently push back the cuticles using a cuticle pusher. With a pair of cuticle nippers, trim the overgrown cuticles.
Step 5: Artificial Nail Tip

Purpose: Provides a base for the acrylic, gel and polygel extension.
Method: Select the appropriate size and shape of artificial nail tip for each finger. Apply a small amount of adhesive to the tip and press it onto the natural nail.
Step 6: Nail Primer

Purpose: Primes the natural nail bed, preventing air bubbles and staining on the nails.
Method: Apply the nail primer with a dry brush to each nail and let it dry for about 60 seconds.
Step 7: Nail Shape
Purpose: Creates the desired shape for the extended nail.
Method: Use a nail file to shape the artificial nail tip to the desired length and shape.
Step 8: Cleaning
Purpose: Disinfects the nail bed by dissolving any leftover acrylic and dip powder on the nail surface.
Method: Use pure acetone or alcohol to clean the surface of the nails after filing and buffing the artificial nail tip.
Step 9: Base Colour Application

Purpose:Adds colour to the extended nails.
Method: Apply two coats of nude pink colour to create the base and cure it for 60 seconds.
Step 10: Ombre Design
Purpose: Creates a unique and versatile look.
Method: Roll the polish onto the nails by placing the edge of the sponge onto the sides of the nails. Begin by slowly rolling the sponge with the nail polish on it over the nails. Repeat this step until the desired ombre effect appears on the nails.
Step 11: Emboss Gel
Purpose: Helps in creating a stunning emboss effect.
Method: Apply the emboss gel with a fine brush and create your desired design with it. Cure it for 60 seconds.
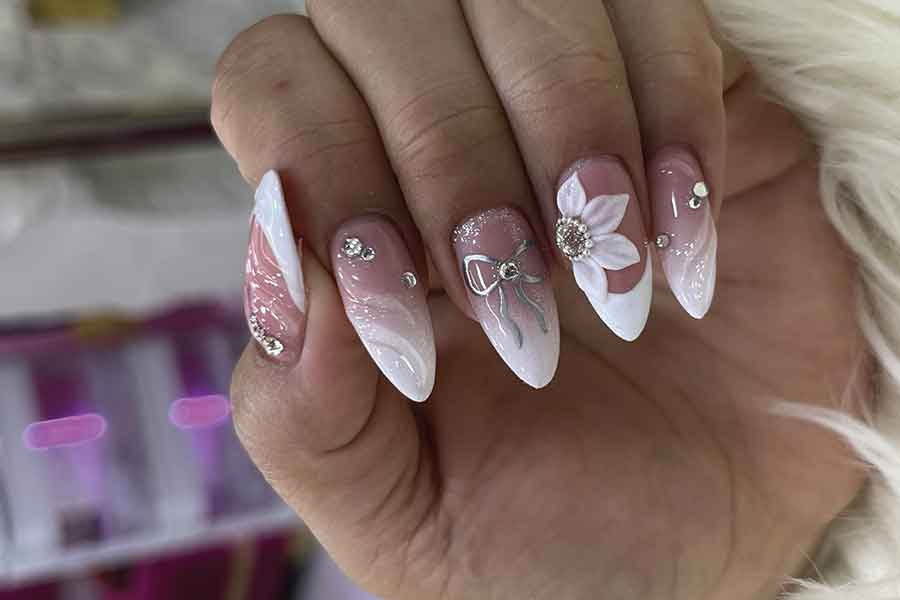
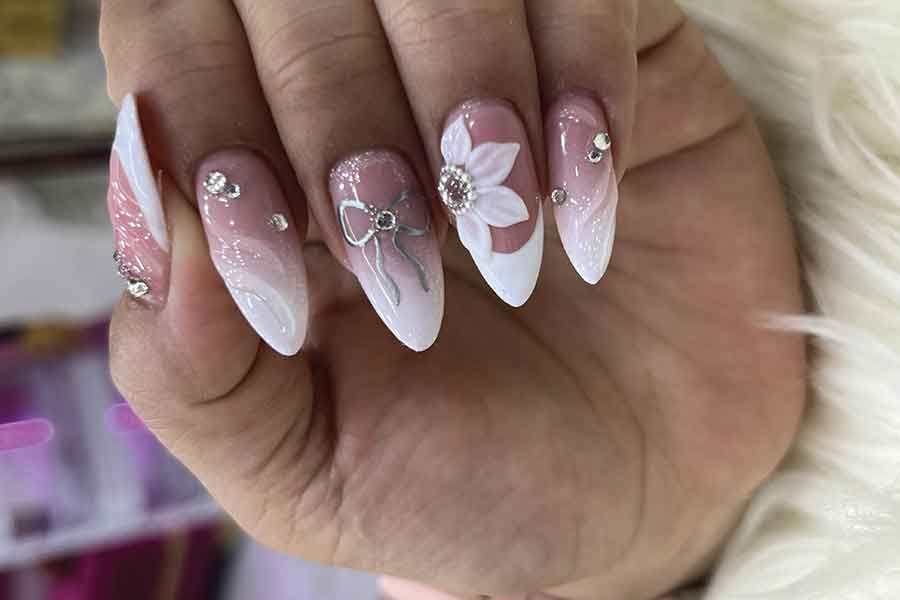
Step 12: 3D Stone Work and Metallic Gel Art
Purpose: Creates a personalised look.
Method: Add 3D stones to the nails for a classy look. For an added pop of colour, make a bow with metallic gel colour on the nails.
Step 13: 3D Flower
Purpose: Adds to the self-expression of the bride.
Method: Create a 3D flower on the nails by using the 3D powder and monomer.
Step 14: Seal with Top Coat and Cuticle Oil
Purpose: Extends the life of the nail art and gives it a polished look.
Method: Apply a top coat to the final nail art and cure it for 60 seconds. Finish the process by applying cuticle oil over the fresh set of nails.
With a little practice and creativity, you can create stunning bridal embellished nails that will make a lasting impression on your wedding day


